A container is a lightweight, standalone, executable package that includes everything needed to run a piece of software: the code, a runtime, system tools, system libraries, and settings. Think of a container like a portable coffee machine. It comes with everything it needs inside such as coffee, water, and a filter. No matter where you take it, you just plug it in and it brews the same perfect cup every time. No need to gather ingredients or adjust settings. It just works.
Docker is the most widely used tool for building and managing containers. It makes sure your application runs consistently across different environments, whether you’re developing on your laptop, deploying to the cloud, or scaling with Kubernetes. Just like the coffee machine delivers the same great cup no matter where you plug it in, Docker ensures your software behaves the same way everywhere, making it reliable, portable, and efficient.
Key Components of Docker
Docker has changed how developers build, ship, and run applications by introducing a lightweight, portable way to manage software with containers. Here are the core pieces that make Docker work:
- Docker Engine: The Docker Engine is the heart of Docker. It’s a client-server application that runs on the host operating system and manages containers, images, volumes, networks, and more.
- Docker Images: A Docker image is a lightweight, standalone, and executable package that includes everything needed to run a piece of software — code, runtime, libraries, environment variables, and configuration files. Images are read-only templates used to create Docker containers. They are built from a series of layers defined in a Dockerfile.
- Docker Containers: A container is a running instance of a Docker image. Containers are isolated from each other and the host system but can communicate through defined channels. Containers are ephemeral , meaning changes made inside a container are lost when it stops unless you persist data using volumes or bind mounts.
- Dockerfile: A Dockerfile is a text document that contains all the commands a user could call on the command line to assemble an image. Using a Dockerfile makes it easy to automate and reproduce builds.
- Docker Networks: Docker provides networking capabilities that allow containers to communicate with each other, external services, or the outside world.
- Docker Volumes & Bind Mounts: Data persistence in containers is handled using volumes or bind mounts .
- Docker Compose: Docker Compose is a tool for defining and running multi-container Docker applications. It uses a
docker-compose.ymlfile to configure the application’s services, networks, and volumes. - Docker Registry: A registry is a service that stores and distributes Docker images. The most well-known public registry is Docker Hub , but you can also run your own private registry.
- Docker Hub: Docker Hub is Docker’s official cloud-based registry where you can find pre-built images for popular applications, frameworks, and tools.
- Docker CLI and Commands: The Docker CLI is the primary interface for interacting with the Docker daemon.
This is a quick introduction to Docker and its core components. But before diving deeper, the key question remains: Why do we need containers and Docker in the first place?
Why Containerize a .NET Application?
Containerization has become essential in modern software development for good reason. By packaging your .NET app into a container, you unlock powerful benefits that improve how you build, deploy, and scale applications. Below are the main advantages of containerizing your .NET application.
Containerization offers several benefits:
- Consistency: Containerizing a .NET application ensures consistent behavior across different environments. By bundling the app with all its dependencies, like the .NET runtime and libraries, you eliminate discrepancies between development, testing, and production. This removes common issues like “It works on my machine!” and makes deployments more predictable and reliable.
- Isolation: Containers provide process, file system, and network isolation, allowing applications to run independently without interfering with one another. This prevents dependency conflicts and enables better resource allocation. If one container fails, it doesn’t impact others, enhancing overall system stability.
- Speed & Scalability: Containers are lightweight and start quickly compared to traditional virtual machines. This makes them ideal for dynamic scaling in response to traffic changes. You can rapidly deploy or remove instances of your .NET application based on demand, especially useful in cloud environments.
- Portability: A containerized .NET app runs the same way everywhere Docker is supported, from local machines to servers to cloud platforms. This eliminates environment-specific configuration issues and simplifies deployment across different systems.
- CI/CD Integration: Docker integrates seamlessly into Continuous Integration and Continuous Deployment pipelines. You build an image once and deploy it across all stages (development, testing, staging, and production) ensuring consistency and reducing deployment risks. Tools like GitHub Actions work great with Docker.
- Microservices Support: Each microservice can be developed, tested, and deployed independently using containers. Docker Compose also allows developers to manage multi-container apps locally, mimicking real-world service interactions and streamlining development for complex distributed systems built with .NET.
- Security & Control: Containers allow you to define resource limits (CPU, memory) and run processes as non-root users, improving security and performance. Because containers are isolated, failures or breaches are less likely to affect the entire system.
- Resource Efficiency: Containers share the host OS kernel, making them lighter than full virtual machines. This leads to lower infrastructure costs, faster startup times, and the ability to run more services on the same hardware.
- Debugging Made Easier: Since containers encapsulate the full runtime environment, reproducing bugs becomes much simpler. Developers can recreate production-like conditions locally by running the exact same container image, saving time and effort in troubleshooting.
- Future-Ready Architecture: Containerization aligns with modern cloud-native practices. As organizations move toward orchestration tools like Kubernetes and cloud-based infrastructures, having your .NET applications containerized prepares you for future growth and scalability.
So, containerizing your .NET application offers significant benefits, from consistency and speed to scalability and maintainability. Whether you’re building a small API or a large microservices ecosystem, Docker helps you build better software more efficiently.
Step-by-Step: Containerizing Your .NET Application
Before we begin, ensure you have:
- .NET SDK installed (for building the app). I will install the latest version, which is 9.0, but the steps are the same for other versions of .NET.
- Docker Desktop (for running containers locally).
- A code editor (VS Code, Visual Studio, or Rider).
Step 1: Create a new project
Let’s start with a basic ASP.NET Core application and I will create a simple ASP.NET Web API project. For that I will use the .NET CLI.
dotnet new webapi -n MyDockerContainerApp.Demo
cd MyDockerContainerApp.Demo
once the app is created, test the app locally to see if it works as expected
dotnet run
Once the app runs successfully, you will see a port number assigned, in my case, it is 5293.

Now, to test this out, you need to navigate to the URL and add ‘weatherforecast’ at the end. In my case, the full URL would be http://localhost:5293/weatherforecast, where you will get the result shown below.

Step 2: Add a Dockerfile
A Dockerfile is a script that defines how Docker builds your container image. In the project root, create a file named Dockerfile (no extension) and add the following content.
# Use the official .NET SDK image to build the app
FROM mcr.microsoft.com/dotnet/sdk:9.0 AS build
WORKDIR /src
COPY . .
RUN dotnet restore
RUN dotnet publish -c Release -o /app

# Use the ASP.NET runtime image for the final image
FROM mcr.microsoft.com/dotnet/aspnet:9.0 AS runtime
WORKDIR /app
COPY --from=build /app .
EXPOSE 80
ENTRYPOINT ["dotnet", "MyDockerContainerApp.Demo.dll"]
What does this file do?
The Dockerfile uses a multi-stage build to create an optimized container image.
In the first stage (build), it uses the .NET SDK image to compile the application. This ensures all required dependencies are available during the build process.
In the second stage (runtime), it switches to a smaller ASP.NET runtime image. This image doesn’t include the SDK, making it lighter and more efficient for production.
The COPY command copies the source code into the container. The dotnet publish command then builds a release-ready version of the app.
The EXPOSE 80 instruction tells Docker the app will listen on port 80. The ENTRYPOINT command defines what runs when the container starts.
This setup improves both performance and security for production deployments.
Step 3: Build the Docker Image
To build the docker image you need to first open a terminal in your project folder and run this command
docker build -t mydockercontainerapp.demo .
It is important that the name is all lowercase because Docker does not support uppercase letters in image names and using uppercase may result in an error. Also, the Docker Desktop app must be running because the docker command relies on the Docker daemon (background service) to execute commands like building and running containers. On Windows and macOS, this daemon is managed by Docker Desktop, so if it’s not running, Docker commands will fail with a connection error.
Once you run this command you will get the following messages on the screen

Step 4: Run the Container
To run this container you need to use the following command
docker run -d -p 8080:8080 --name myapp mydockercontainerapp.demo
myapp is just a name, so feel free to use any name you want. Once this command is executed you will get the below message, which is a docker image id.
Once you get the ID as a response, it means everything worked as expected. Now, you can open your browser and go to localhost:8080, the port you defined in the Docker run command, and you will see the following result.

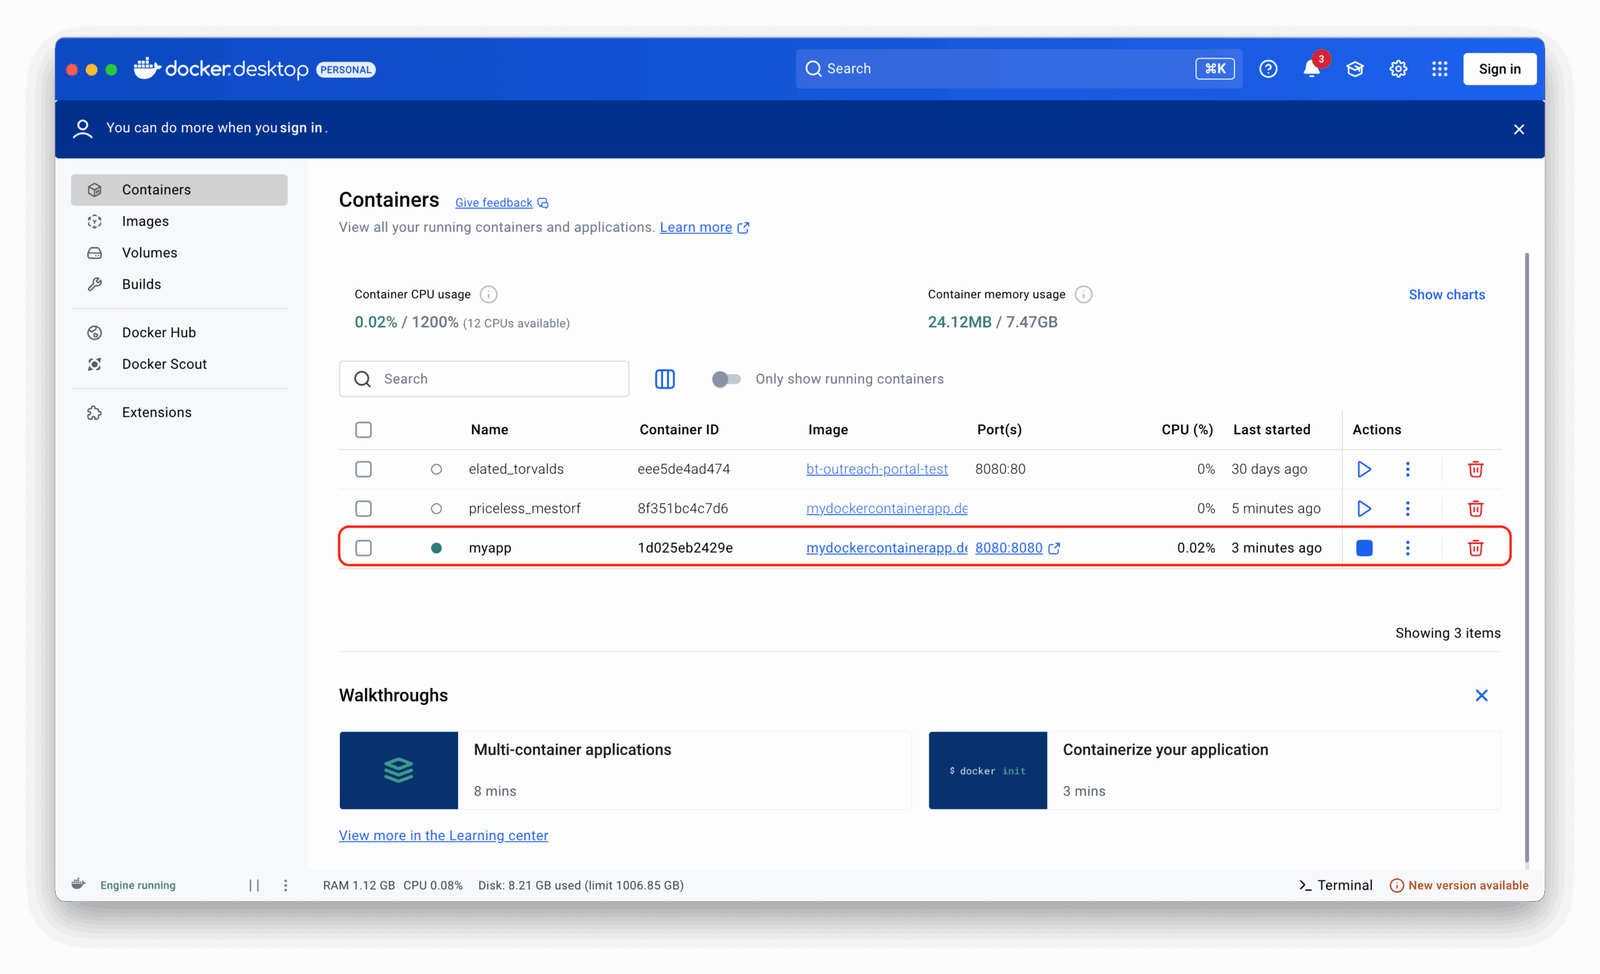
Another way, is to just go to Docker Desktop and manage the docker image from the UI. Once you open it you will already see the docker image with the name (myapp) that you defined on the command above.

Conclusion
Whether you’re working on a small personal project or a large enterprise application, learning how to containerize your .NET apps with Docker is a valuable skill that will streamline your development workflow and improve your deployment reliability.